THL Toolbox > Audio-Video > Creation Of Audio-video > Recording of Terms for Tibetan Dictionaries
Recording of Audio to be used in Tibetan Dictionaries Project
Contributor(s): Bradley Aaron
The goal of this project is to create an audio recording for each and every term in the Tibetan dictionary in the three main dialects of Tibetan (Ü-skad, Khams-skad, and Amdo-skad). The challenge is to create high-quality recordings with no background noise that have a minimal and uniform amount of silence both before and after the recorded term.
In order to accomplish these goals the recording of the terms is done on high-quality digital recorders (such as the Zoom H4n) and the terms are read by Tibetans with acknowledged excellent pronunciation in their dialect and who are able to operate the recording devices in a consistent manner (e.g. can start and stop the devices, and consistently press the ‘mark’ button).
Here are some guidelines for making audio recordings of Tibetan words/phrases for THL Dictionary.
Recording Quality Standard
For sound that will never accompany with Video: 24 bits at 44.1 kHz (24/44.1kHz)
Non-preferred option if space is limited on recording media and not recording video use: 16 bits at 44.1 kHz (16/44.1kHz)
For sound to accompany Video 24 bits at 48 kHz (24/48kHz)
References:
 http://www.tweakheadz.com/16_vs_24_bit_audio.htm
 http://www.dvxuser.com/V6/archive/index.php/t-238271.html
Audio files should be recorded ONLY in WAV format (not Mp3). These WAV files preserve the maximum quality and can be read and stored by Kaltura.
Start at the top of the spreadsheet of THL dictionary words and record 50 terms at a time before stopping the recording, noting where you left off in the spreadsheet after each session.
During the recording of the terms, read each term clearly and in a natural voice and after the term has been read, click the ‘Record’ button on the H4n to ‘mark’ that portion of the file, then move to read the next term. You don’t have to rush to read each term, but you MUST press the ‘record’ button after you read each term.
If you make a mistake and need to re-read the term, pause the recording and make a mark in a notebook noting which term had an issue, and what you did (for example, if you mis-read Lhakpa, you would mark “Lhakpa” and then note that you re-read it immediately after the mistake), this way we will know which terms need to be deleted and which kept.
Once 50 terms have been recorded, you hit the ’stop’ button to save the file. Then move on to read another 50 terms and repeat the procedure until all terms are read. There are over 200,000 terms in the Tibetan dictionary, so this will take many weeks to complete.
Creating Individual Files : Overview
Raw recordings of the terms must be broken down from the large WAV files of 50 terms each into individual files and then must be checked to ensure proper quality and term order before they are uploaded online.
In order to do this, THL uses the Reaper Digital Audio Workstation (available here:  http://www.reaper.fm/). Start by downloading and installing Reaper on either a Mac or a PC. After installing Reaper, go to this website (
 http://www.standingwaterstudios.com/) and download and install the SWS extensions, which are needed for the process below.
Then follow the detailed procedure below to break apart the large WAV file into individual files.
Step-by-step Guide
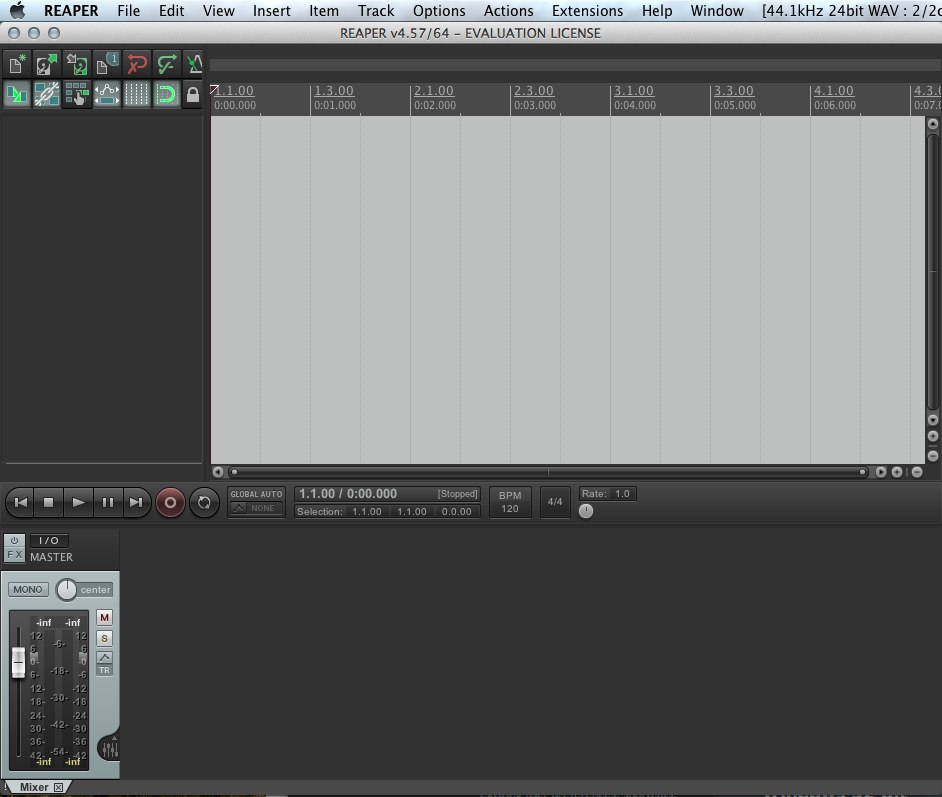
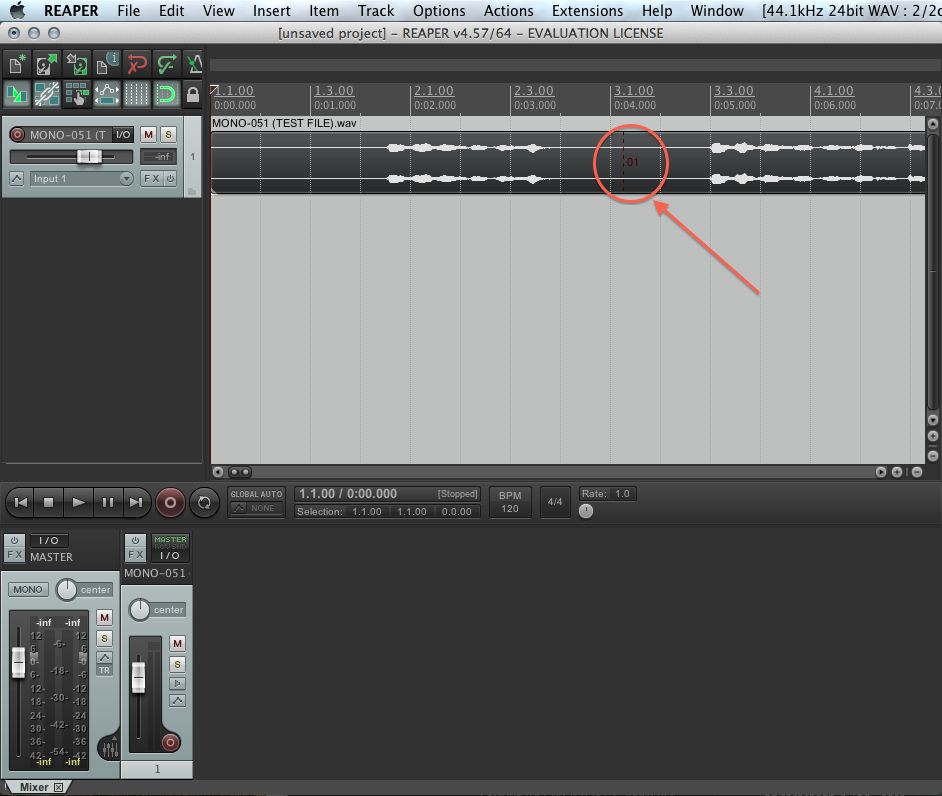
Drag the WAV file you want to work with into the Reaper and drop it in the dark grey box on the left side of the screen and it will appear in the workspace.

You should see the marker points from when the ‘record’ button was pressed. If you do not, then the recording was made incorrectly and must be re-done.
NOTE: If you recorded the track accidentally or had no choice (as with the Zoom H5 onboard mics) to record as a stereo track, you need to first consolidate (mix down) the stereo track to a mono track before proceeding with the procedure below. To do this: Select the waveform by clicking on it (which makes it turn light grey) and then go to item -> Item Settings -> Take Channel Mode: Mono (downmix). This will consolidate the two waves into only one, but you still should see playback happening out of both the left and right channels of your speakers/headphones. Make sure that you can hear sound coming out of both the left and right sides when you play the file before proceeding to the next steps.

First select the waveform by clicking on it (which makes it turn dark grey) and then go to item -> Item Processing -> Import Media Cues from Items as project markers
In Case of Duplicate Terms (mistaken reading)
If there are any duplicate terms recorded you will need to cut out the mistakes and move the waveform over to take the place of the cut-out term. To do this, click on the grey area above the wave form you want to remove and drag until you reach the next marker indicator (sometimes these do not line up exactly. This is okay. Once you have highlighted the selection, right click and select “cut selected area of items”. The waveform has now been removed.

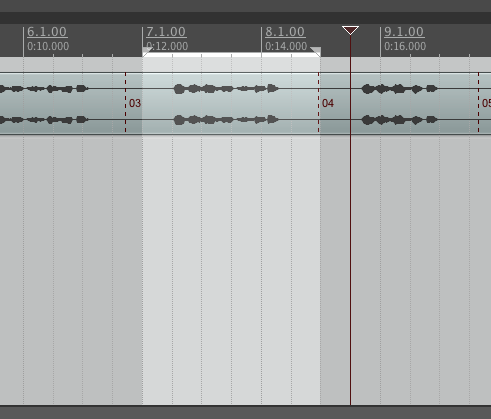
Next grab the waveform and slide it to the left into the space created by the cut waveform, making sure that the waveform stays between the media cues. You do not need to pull the waveform all the way to meet the other form on the left, and you MUST scan the rest of the waveform to ensure that none of the recorded audio is cut off by a media cue see image.
In Case of Skipped Terms
If there were any terms skipped accidentally during the recording process you will need to create a space for them in the file export to make sure that the terms do not get out of order when exported as individual files. To do this, put the cursor on the nearest media cue point to the place where the omission occurred (for example, if the reader missed reading term number 25, they should put the cursor on the 24th media cue marker) and then click “Item—>Split Item at Cursor”
This will create a break in the waveform. You then drag the waveform directly to the right of the split until it falls outside of the media cue points where the missing term will go see image. Doing this will create a separate file of silence and will allow the other terms to stay in perfect order. Make sure to scan the entire file to ensure that no sound is cut off by a cue point.
To fix the omitted term, you will need to record the skipped term and then save it with the exact same file name of this silent file and put it with the other files to maintain the correct order of recorded terms.
Creating Regions from Markers
After any necessary corrections are made, then follow the instructions below to create regions from the markers:
go to "Actions -> Show action list" and enter "marker region" in the filter (to find the action more easy). Doubleclick the action "SWS: convert markers to regions"
This will not remove any of the silence from the beginning or end of each recorded segment. I found if you do this before the render (which creates the individual wav files from the regions), it collapses the audio timeline and makes it impossible to use the next ‘render’ step to get individual files. Silence will be removed server-side once the file is imported to the Media Management System.
Creating Individual Files
To create individual files do this:
Go to "File -> Render" and in the render dialog at "Render bounds" choose "Project regions" from the rolldown menu.
At "Filename" enter TD_Rec_1-50_“ (where the 1-50 changes for each series, for example 51-101, 102-52, etc.) and then click on "Wildcards" and select "$filenumber” and enter the number where you want the filenames to start like this: “$filenumberN”. If this is the first set of 50 tracks, the “N” will be “1” if it is the second set of 50, the “N” will be 51, and so on and the entry will be TD_Rec_1-50_001. This allows us to create filenames with the proper sequence numbers to match the original terms. Eventually this will have a sequence number over 200,000, which I don’t think will be a problem (we can represent thousands like this 2k or 20k, etc. where 2k000=2,000 and 20k000=20,000 and 200k000=200,000).
Then, at "Output format:" select "mp3" (NOTE: you will have to follow the onscreen instructions to download and install a 3rd party codec to be able to export as mp3)
Select the destination for the rendered files in the “Render to:” field and make sure to put the files either all in the same folder, or in folders organized by recording segments such as 1-50, 51-101, etc. (whatever makes more sense for you).
Click “Render XX files…” (where XX should be something like 51 or 52).
The software will process the files (this takes varying amounts of time depending on your computer speed) and save them to the directory you selected.
Checking Quality
The recording supervisor must check the quality and accuracy of all recordings and MUST ensure that the terms are completely recorded (without skipping even one) and are in the correct order. In order to keep errors to a minimum, the supervisor should be checking quality weekly when recordings from that week are broken into individual files.
Depending on how consistently and accurately the person doing the recordings pushed the marker button, there may be ‘extra’ files created (often there are at least 51 files because of a final press of the ‘record’ marker button. This is normal, and you can easily correct it by checking the last two files produced by the render and deleting them. The first time you create individual files you may have 52 files, just check that the 51st and 52nd files are just silence and delete them.
Next, check the last recording file from the group of 50 and see if it matches up with the last term recorded for this session. There should be no surprises if the recorders were doing a good job of noting where mistakes/re-recordings were made, but if the final term does not match with expectations, then check the middle term, and see how far that term is off from the expected term. For example, for the first set of 50 terms, the last term should be XXX, if it is not, check the middle term (#25) and see if it is really the 25th term in the sequence from the spreadsheet. If it is, you know that the missed term was after the 25th term, and you can work down from there to find out where the problem occurred.
If a term needs to be recorded because it was missing, mark it down in a spreadsheet using the name and the number of the term. A re-recording should be done right away, so as not to forget.